If you've already installed KSign on your iPhone or iPad, the next step is to learn how to use it to sign and install IPA files.
KSign has different sections, including Files, Library and Certificates. At first, these options might seem a little confusing, but once you know what each one does, signing an IPA is quite simple.
In this guide, we'll show you how to import an IPA file, add your certificate, sign the app and install it on your device.
Before you start, make sure KSign is already installed and working on your device. If you haven't installed it yet, follow our KSign installation guide first.
Getting Started With KSign iOS
When you open KSign, you'll see different options such as Files, Library, Settings and Certificates.
Here's what you need to know:
- Files: This is where you import and manage your IPA files.
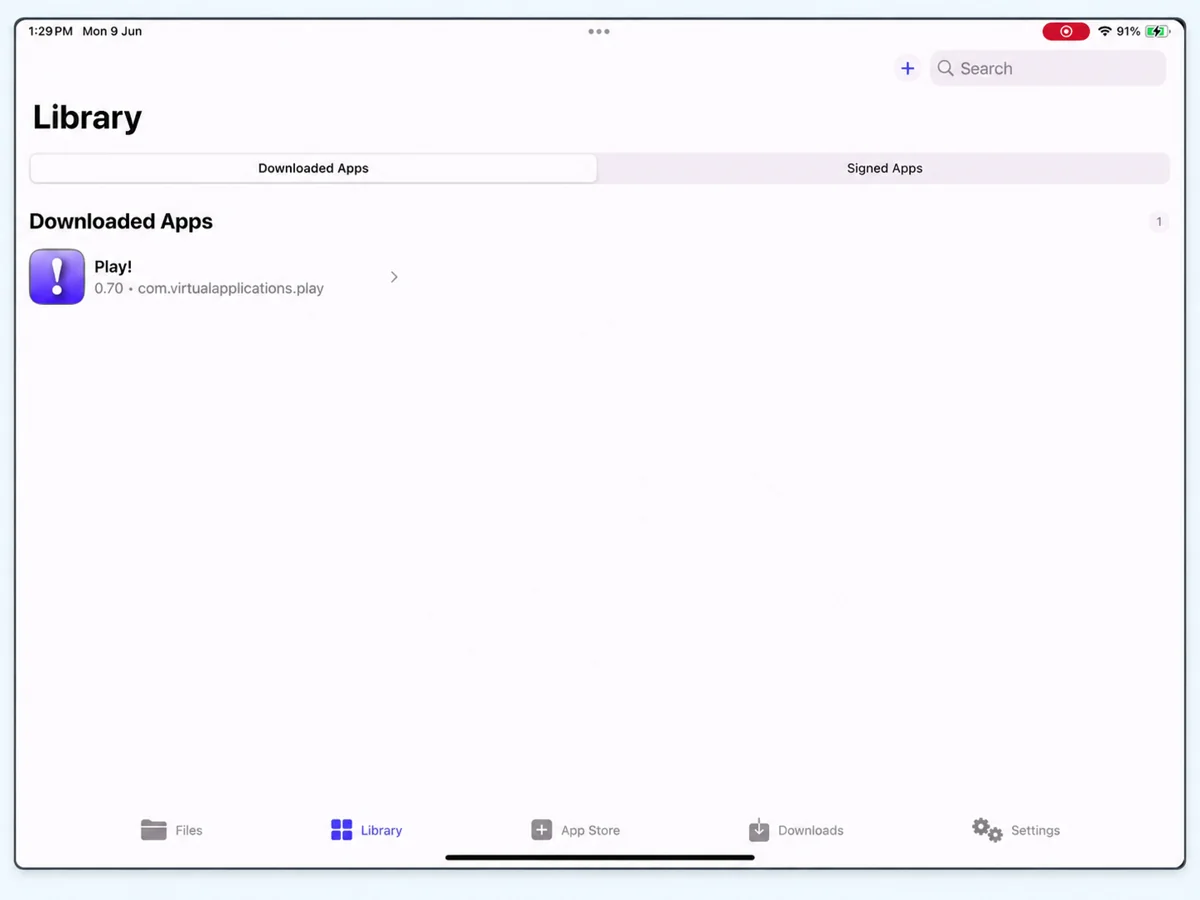
- Library: Here you'll find your imported apps under Downloaded Apps and processed apps under Signed Apps.
- Certificates: This section lets you import and manage the certificates used to sign your apps.
- Settings: You can change the app's available preferences here.
If you're using an iPad, these options may appear in the sidebar, while on an iPhone you'll usually find them in the navigation tabs.
Step 1: Import Your IPA File Into KSign
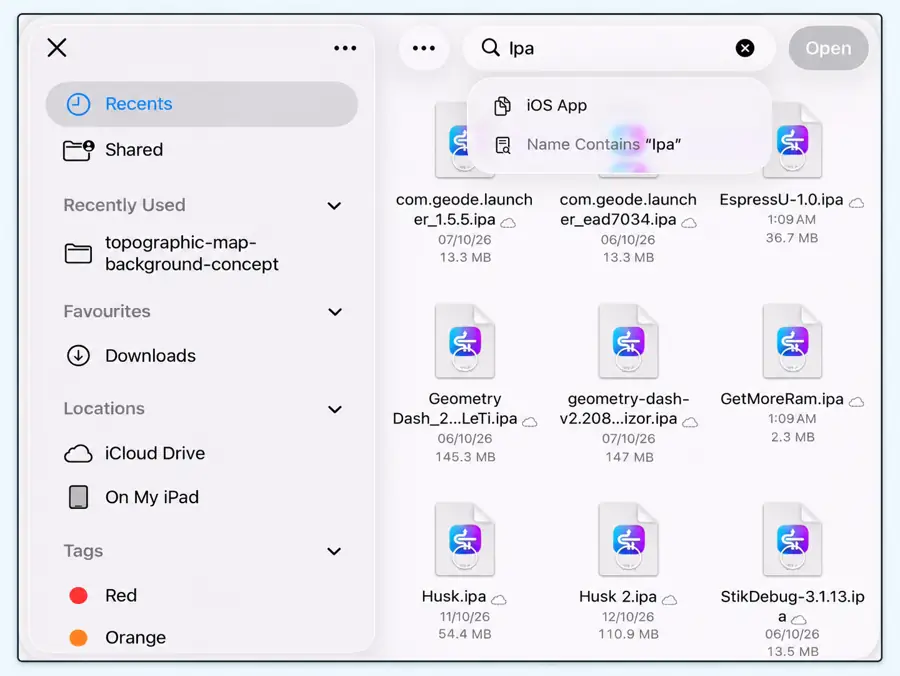
First, download the IPA file you want to install and save it to your iPhone or iPad. You can find the downloaded file in the iOS Files app.
Now follow these steps:
- Open KSign and go to the Files tab.
- Tap the + (plus) icon to open the file picker.
- Find and select the IPA file you downloaded earlier.
- Once the file appears in KSign, tap on it and select Import to Library.
- Go to the Library tab and check the Downloaded Apps section.
You should now see your imported app in the list. If it doesn't appear, go back to Files and make sure you've imported it to Library.
Step 2: Import Your Signing Certificate
Before you can sign an IPA file, you need to add a certificate to KSign.
You'll normally need two files:
- .p12 file: Contains your signing certificate and private key.
- .mobileprovision file: The provisioning profile used for signing the app.
Open the Certificates section in KSign and import the required files.
If your certificate has a password, enter it when prompted.
Make sure you're using the correct certificate and provisioning profile together. Otherwise, you may face errors when signing or installing the app.
If you're not sure how to add these files, check our KSign certificate import guide.
Step 3: Sign the IPA File Using KSign
Now that you've imported your IPA and certificate, you're ready to sign the app.
- Open KSign and switch to the Library tab.
- Under Downloaded Apps, tap the app you want to sign.
- Select Sign or Sign & Install.
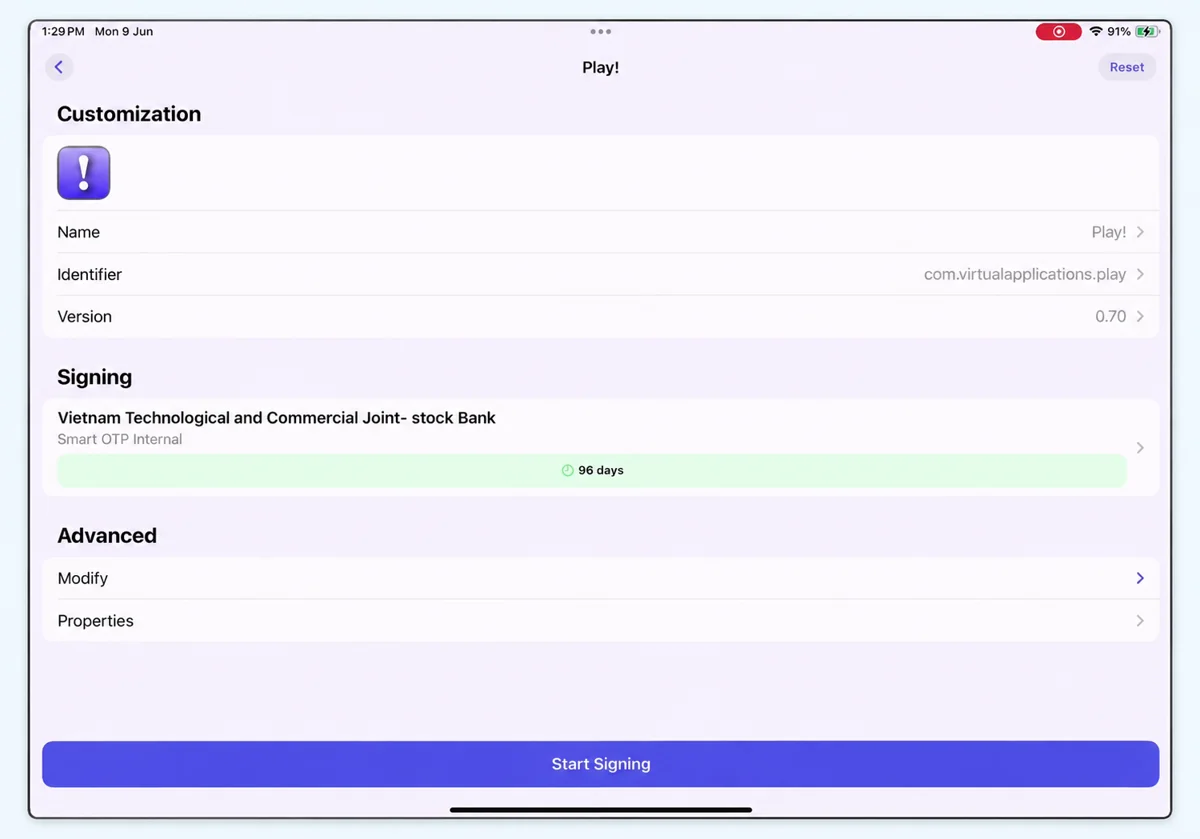
- You'll see customization options such as Name, Identifier and Version. You can leave these unchanged if you don't need to modify anything.
- Under Signing, select the certificate you imported earlier.
- Tap Start Signing to begin.
KSign will now process the IPA file using your selected certificate. Keep the app open until signing is complete.
If everything goes well, your signed app will be ready to install.
Step 4: Install the Signed IPA on Your iPhone
Once KSign finishes signing the IPA, you can install it on your device.
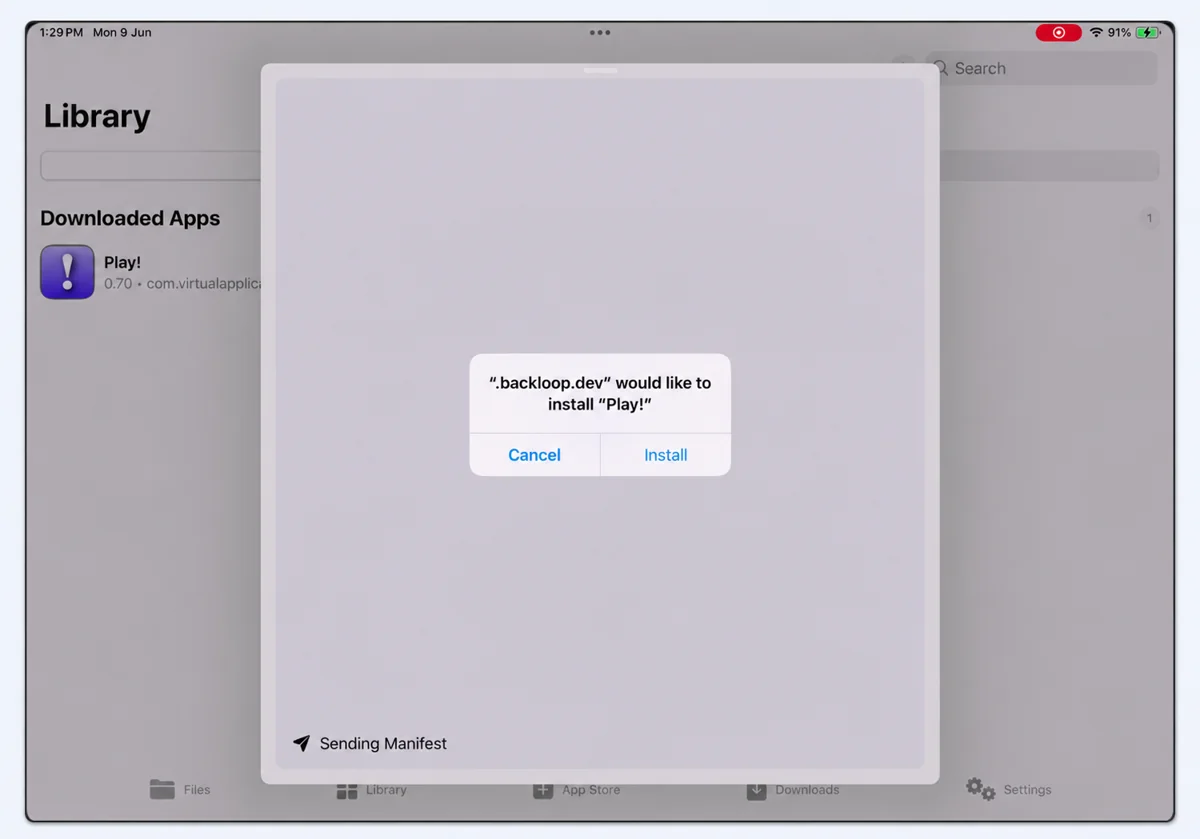
Tap the available Install option. Your iPhone will show an installation confirmation asking whether you want to install the app.
Tap Install to continue.
Now return to your home screen and wait for the app icon to finish installing.
Once it's installed, tap the app icon to open it. If the certificate is valid, the provisioning profile supports your device and the app is compatible with your iOS version, it should launch normally.
Common KSign iOS Problems and How to Fix Them
Sometimes you might run into an error while importing, signing or installing an IPA. Here are a few common issues you can check.
IPA File Not Showing in Library
If your imported IPA doesn't appear in Library, go back to the Files tab. Tap the IPA file again and make sure you select Import to Library.
Certificate Not Importing
Check that your .p12 file and provisioning profile are correct. If the certificate requires a password, make sure you're entering the right one.
KSign Fails to Sign the IPA
First, check the error message shown by KSign. Make sure you've selected a valid certificate and compatible provisioning profile. You can also try signing the IPA again without changing its original settings.
Installed App Won't Open
This can happen if the signing certificate has expired, been revoked or doesn't support your device. The app itself may also be incompatible with your iOS version.
Final Words
That's how you can use KSign iOS to sign and install IPA files on your iPhone or iPad.
Once you've imported your certificate, you won't need to repeat the entire setup for every app as long as your signing files remain valid. Just import the IPA into Library, select your certificate, sign the app and install it.
It's also a good idea to keep a copy of your original IPA files and certificates so you can use them again when needed.
If you ever need to reinstall KSign, you can get the package from our KSign download section.
 Last updated:

KSign Guide
An independent resource covering app installation, signing files and practical setup for iPhone and iPad.
About this website →